Choosing a Hardware Board
One can buy a hardware development board for testing and implementing a basic MQTT client. The board I used was purchased from Amazon at the following link:
This is a NodeMCU Development board with a ESP8266-12-E SOC.
In the following sections, I will describe how I set this up to work with Arduino IDE and implemented some basic MQTT Client code, so that it connects to a local WiFi in your home, and to the iot.eclipse.org server, so that messages can then be received by the Android App that implements another side of the MQTT client.
Working with the ESP8266 NodeMCU Amica Blynk Board
The ESP8266 processor from Espressif is an 80 MHz microcontroller with a full WiFi front-end (both as client and access point) and TCP/IP stack with DNS support as well. It has Integrated low power 32-bit CPU, and has a Standby power consumption of < 1.0mW (DTIM3). ESP8266 consumes less than 12uA in sleep mode and less than 1.0mW (DTIM=3) or less than 0.5mW (DTIM=10) to stay connected to the access point. It has 16 GPIO pins (ESP-12-E has 22 pins).
Specification is available at https://www.aerial.net/shop/PDF/ESP8266_Specifications_English.pdf.
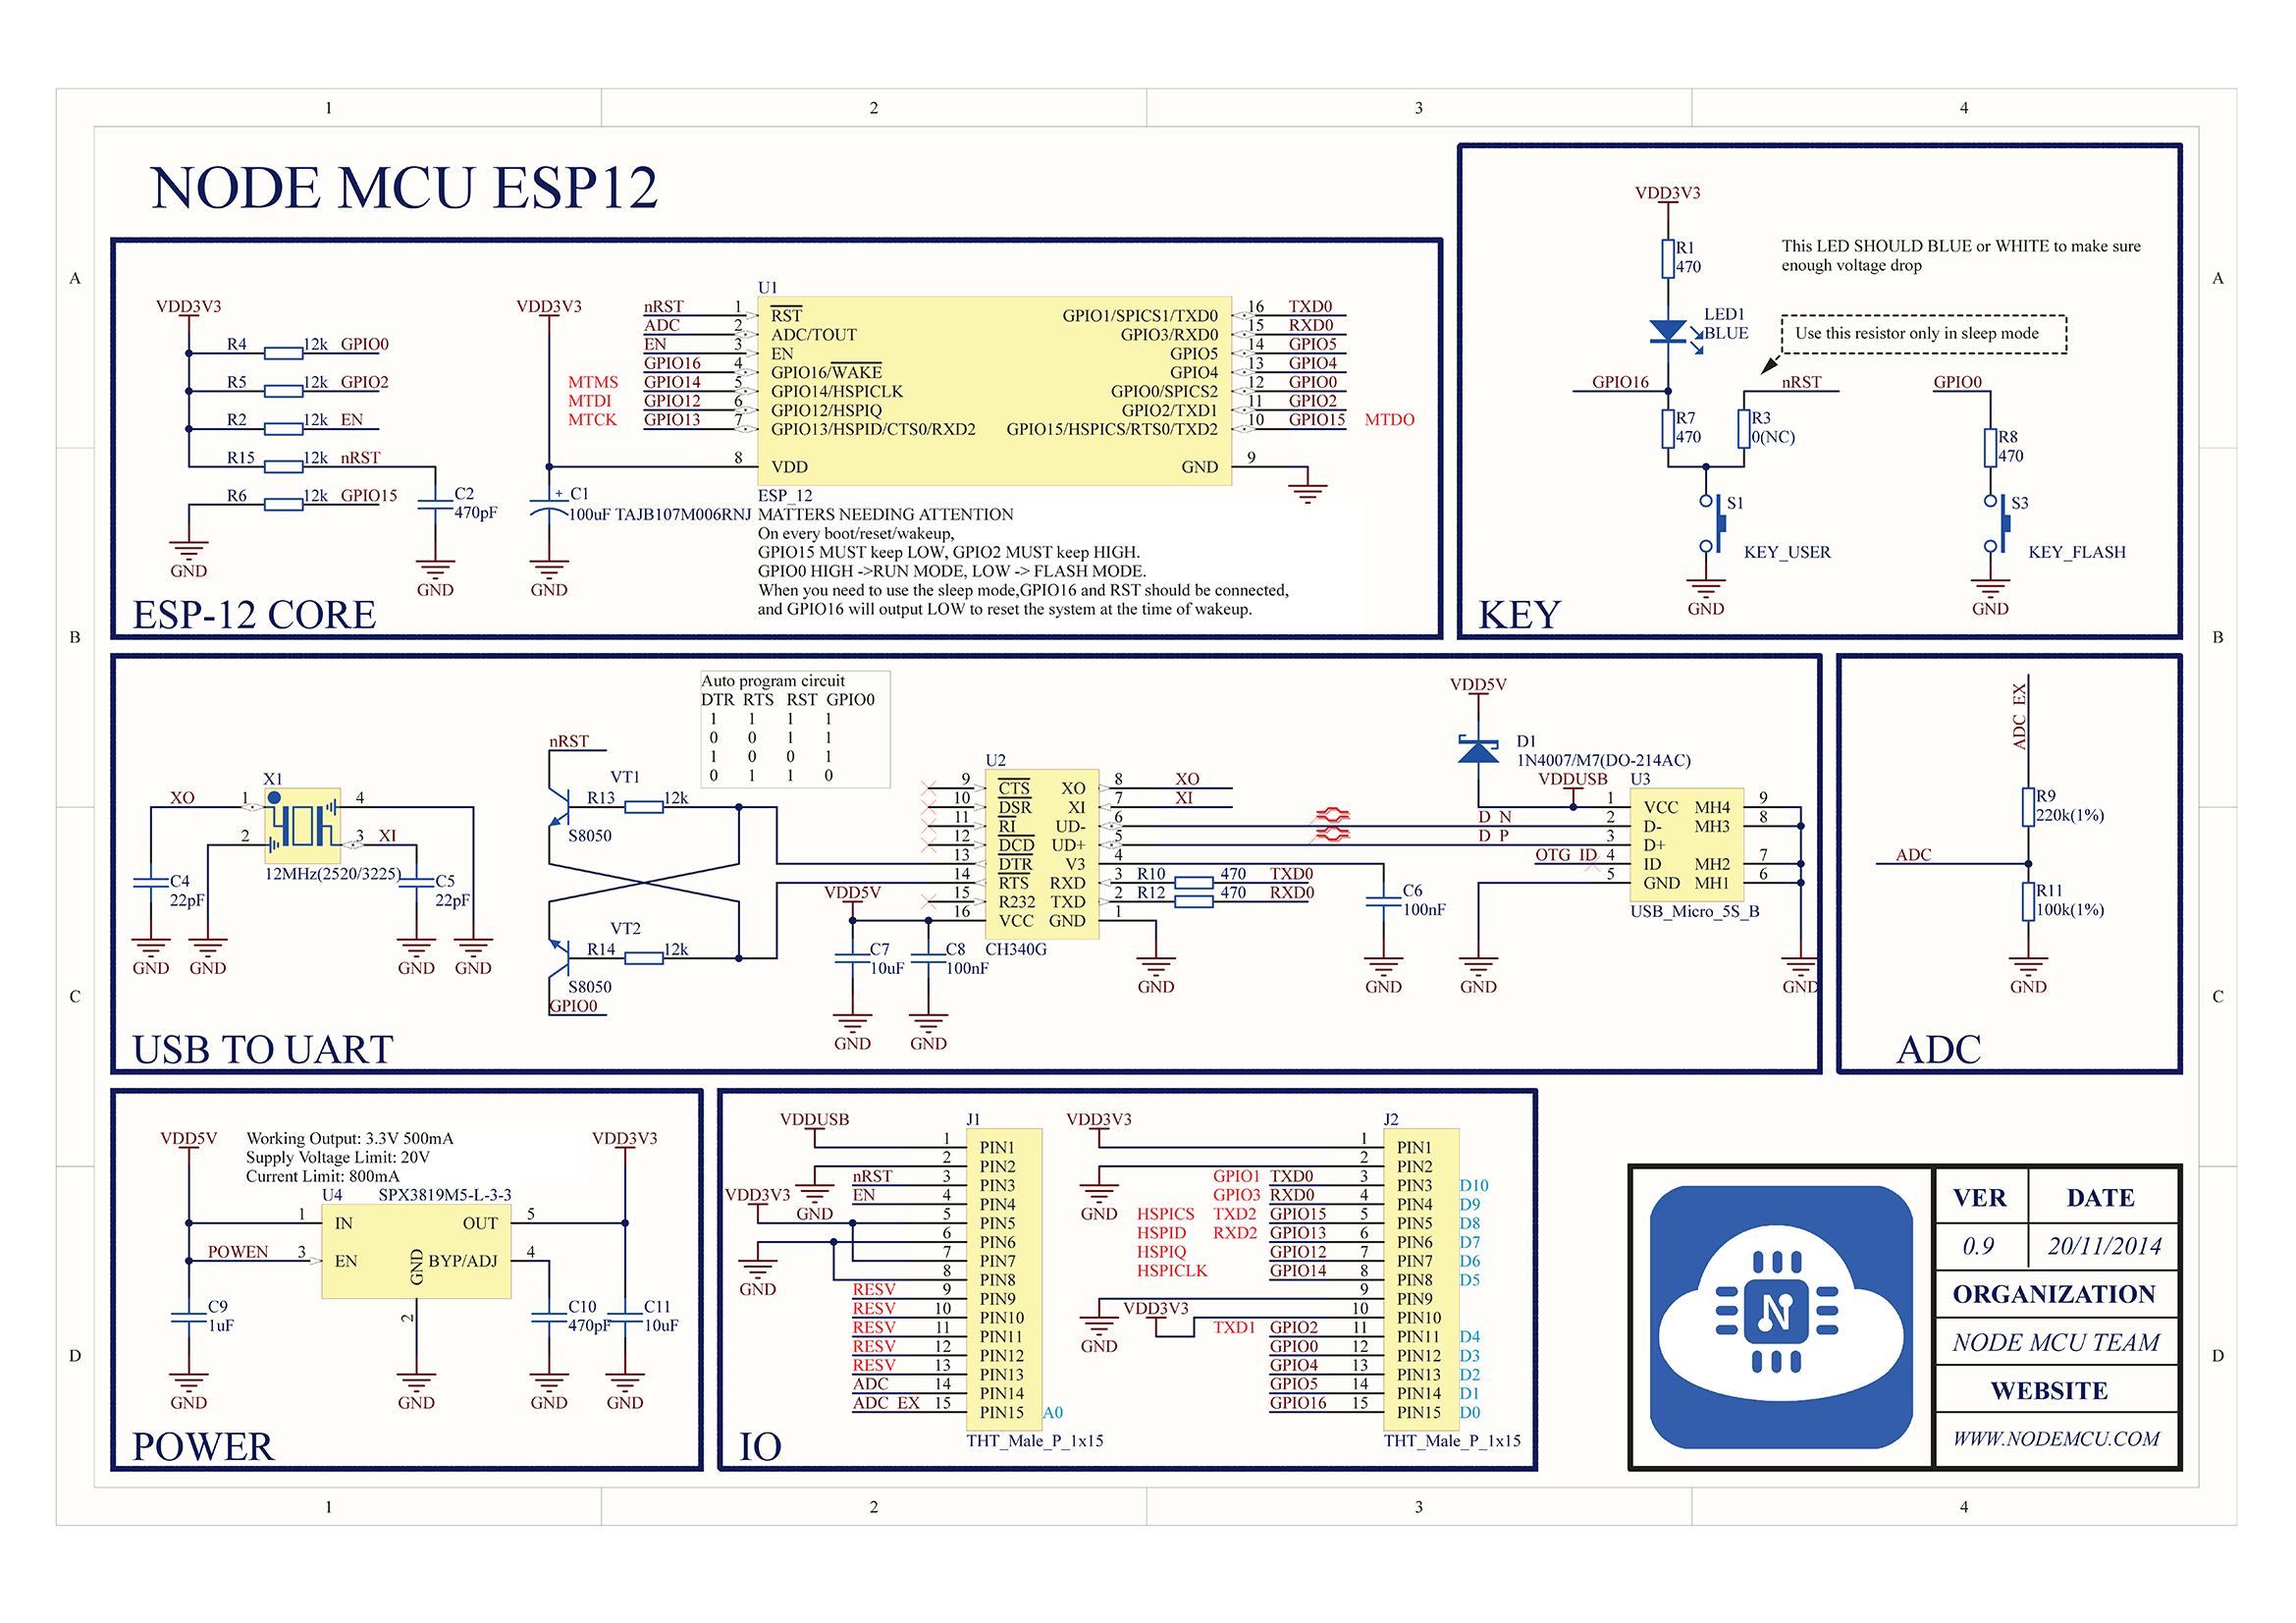
NodeMCU
We are using ESP8266 12E on a NodeMCU Development Board. Information on ModeMCU can be found at NodeMcu -- An open-source firmware based on ESP8266 wifi-soc.. NodeMCU is an ESP8266 on a custom dev board with a firmware written in MicroPython that incorporates GPIO, PWM, IIC, 1-Wire and ADC functions, along with a Lua environment and built-in libraries to use Wifi, MQTT, telnet, etc. The schematic for NodeMCU can be found at https://raw.githubusercontent.com/nodemcu/nodemcu-devkit/master/Documents/NODEMCU_DEVKIT_SCH.png. All NodeMCU-related information is at NodeMCU · GitHub. The firmware repository is at GitHub - nodemcu/nodemcu-firmware: Lua based interactive firmware for ESP8266, ESP8285 and ESP32.
The NodeMCU-devkits has a CP2102 USB to UART bridge and a voltage regulator on board each. So, we can connect the NodeMCU-devkit with a normal USB cable to a PC for communication and power supply. Furthermore, the module has an auto program circuit, which controls the activation of the boot-loader. No key must be pressed. We have to consider 3.3 V logic levels only for digital IO; one will need to level shift any 5 V signals running into the NodeMCU device.